Blog Background

Monday, June 27, 2011

FREE wall art


After seeing this paint chip quatrefoil art posted by Amy from "Modge Podge Rocks" on Thursday, I promptly ran the store and picked up paint samples in just about EVERY color.
But then I couldn't decide if i wanted to do a rainbow of colors or keep it to just a monotone pallet. So i went searching for ideas.

HOLY COW! some crafty bloggers have made some amazing things out of FREE paint chips.
This poster from "Apartment Therapy" is a.m.a.z.i.n.g. I would never have the patience for a project like this, but she did a great job.

I love this knock off art from "The Real Housewives of Buck County." I think this is what I may end up doing with all my paint chips.

ohhh... I love the bright colors and playfulness of this circle paint chip art from "The 3 r's" She has some other really fun designs featured on here page here:

Sunday, June 26, 2011

Sweet Tooth Sundays: Pie Pops


I've never been a huge fan of pie. except chocolate pie. because its chocolate. duh. but when I discovered this amazing recipe, I HAD to try it out. They are so cute. Who DOESN'T want pie on a stick. It tastes so much better. I promise. kind of.

The pie pops pictured above are from Bakerella.com. She got the idea from here:http://luxirare.com/float/ and she has a tutorial here: http://www.bakerella.com/easy-as-pie/But I am going to tell you how to make them as well.

I made mine with chocolate filling because everything is better in chocolate.

First you are going to want to soak your sticks in water otherwise they will burn in the oven. I Would say you need to soak them between 30-60 minutes.

Then make your pie crust. any recipe will work. I used this one :

  • 1/2 cup vegetable shortening
  • 1 1/2 cups all-purpose flour
  • 1/2 teaspoon salt
  • 1/2 cup cold water

  • Directions

  • 1. Mix the shortening, flour, and salt together with a fork until very crumbly. Shortening can be substituted for butter. But not margarine. Margarine is gross. Slowly add water until you reach a nice doughy consistency and mix lightly with a fork.

  • 2. Roll out on a floured surface. Use a cookie cutter or jar lid to cut out circles
Next, plop a nice disgusting looking blob of filling (I just used pudding) onto your pie pop. yummm... remember that chocolate makes it better. make sure not to put too much in or it will explode in the oven. like mine did.

Cover up that filling. looking at it any longer is gonna make me not want to eat it. And I really want to. I know it still looks like an ugly blob. Don't worry. It will get better.

Take one of your sticks and press the sides together to make cute little patterns around the edges. Then insert the sticks into the pie and press them down into the dough. just a little bit.

Then brush egg whites over the top. I'm sorry I don't have a picture of this part. But this is what mine looked like when they were all ready to put into the oven.

Bake them at 325 for about 10-15 minutes. The filling in mine either dried up or spilled out all over the pan and burned. Maybe next time I should try inserting the filling AFTER I bake the crusts. Or I should just not use chocolate :'(

Saturday, June 25, 2011

Chevron

I don't know about you, but I have been seeing Chevron stripes EVERYWHERE! I have fallen in love with them. I love the bold statement they make.

I've seen them in clothing, crafts, cards, weddings, and my favorite of all: home decor. I think adding a fun, bright chevron stripe to a room makes it a more cheery place to spend time.

Here are I few examples of things I would like to have in my house someday:

this red chevron rug is from "High Heeled Foot in the Door". It adds so much to this room and helps enclose the space a little bit. It really ties everything together. She even has a tutorial. She put together this rug for only $55 check it out: http://high-heelfootinthedoor.blogspot.com/2010/04/diy-chevron-rug.html
I'm drooling over this light blue chevron couch from "bazaar of serendipity." I'm just dying to know where she got it. It is so chic and fresh and modern. Does anyone have a napkin?

This DIY coatrack from Trisha at "The Sweet Survival" is simply genius. I love the orange and teal together! Go check out her tutorial here: http://thesweetsurvival.blogspot.com/2011/05/chevron-hook-rack.html

My absolute FAV. is this yellow and gray nursery by Nadia over at "House Thirty Six." Everything about it is absolutely perfect and so organized, but I just can't stop raving about that AMAZING chevron stripe wall. I want one. now. I'm gonna need that napkin back again.

Friday, June 24, 2011

Paper Beads


My cousin Mim (whose blog can be found here: http://madmim.com/ ) makes these awesome paper beads. I could spend all day just gushing over how creative she is. Here are some pictures of the amazing things she has made with them:

So I thought I would share a couple tutorials with you. The possibilities of things you can make with these are ENDLESS. Earrings, bracelets, necklaces, wall decor, etc.


and here is a tutorial from natasha fialkov whose beads look like glass rocks!:
All her photos are copyrighted, so I couldn't post one here, but go check them out, they look awesome!

Greatest Thing Since Sliced Bread

I found these cone thread adapters on clearance at Joanns for only .50 cents!

All you do is stick the little plastic thing into the center of your cone thread (which is $1.99 for 3000 yards compared to Gutermanns 110 yards for $1.79):

And you can put that monster right onto your regular sewing machine. I'm so excited about how much money this is saving me on thread!!

Thursday, June 23, 2011

Fabric Belts

The other day one of my coworkers came into the store with her kids and her son was wearing this fabulous fabric belt that she made. It was so cute that I rushed home and HAD to find a tutorial.
Here are my 3 favorite:

Now I know to do with all those extra fabric flowers I have made.


Here is a GREAT use for tiny fabric scraps


I love the bow on this one! I think it takes the cake.


happy sewing!


Wednesday, June 22, 2011

Peanut Butter Cookie Sandwiches

I used the Lion House cookie recipe that I blogged about in my post "cherry chocolate chip cupcakes" for these. They are just sooo good. Granted, most of the dough ends up in my mouth and not in the oven (which is why there is only 5 cookie sandwiches in the picture). I just LoVe cookie dough.

All I did with these bad boys is mixed peanut butter and powdered sugar (did you know that is how they make reeses? yummm!) and scooped a big spoonful into the middle of the cookie and topped it with another cookie then rolled it in chocolate chips.

Inspiration

I would just like to give a shoutout to the following people for being my inspiration:

2.
3. A girl and a glue gun
4.

Tuesday, June 21, 2011

LOVE!

I was browsing blogs the other day when I came across this amazing, super duper, uber cute shower curtain tutorial. It is a knock of off this Anthropologie curtain:

ohhh... how I wish I had a ruffle foot on my sewing machine.

here is the link if you would like to make one for yourself.: http://elleapparel.blogspot.com/2011/02/anthropology-ruffle-shower-curtain.html
Someday my shower curtain will look like this. someday.

Monday, June 20, 2011

Doughnuts

I can't for the life of me remember what recipe I used for these :( but it is really the toppings that matter. You can throw the doughnuts together with any old bread or roll recipe.

When the dough is ready, roll it out on a very floury surface and cut out circle shapes (I used the lid from a peanut butter jar for this)
p.s. this is a very messy process

Then cut out doughnut holes from the middle of each doughnut (I used a vanilla lid)Now, fry up your doughnuts, between low and medium heat for best results

Before I put toppings on my doughnuts, I dipped them all in glaze
(about 1-2 tablespoons of milk for every cup of powdered sugar)

Now comes the fun part, finally. The toppings. This one is drizzled in carmel sauce and Dulce de Leche

mmm.... my husbands favorite was the smores doughnut, dipped in chocolate and graham cracker crumbs, with a marshmallow melted in the middle

My favorite were the chocolate toffee

Other varieties I made included chocolate with sprinkles, peanut butter, cinnamon sugar, almond glazed, toasted coconut, and butterscotch glazed.

Monday, June 13, 2011

J crew inspired skirt tutorial


This is the look I'm going for, but longer:First, I cut out dozens of of little squares, each about 2x3" Then I put Fray Check around the edges of every single one of them. (This would be a good time for a LOTR marathon, because it takes FOREVER!)Then I took a skirt I already owned and traced around it to make my skirt pattern.


Pin all of your squares in tiered, offsetting rows down and around the whole skirt.

Sew on each row, lifting up the flaps from the previous row as you go.

Finished Skirt:


Sunday, June 12, 2011

Cherry Chocolate Chip Cupcakes

These scrumptious goodies have a layer of cupcake, a layer of marshmallow, a cookie, and a layer of frosting.


I started by mixing together a white cake mix and adding cherry kool-aid flavoring and chocolate chips. The last couple minutes the cupcakes were in the oven, I put a marshmallow on top of each one.

Then I whipped up a batch of cookies using this recipe from the lion house desserts cookbook (which I cut in fourth):

1.75 cups butter
1.75 cups brown sugar
1.25 cups white sugar
4 eggs
5.5 tbsp. water
1.5 tsp. vanilla
6 cups flour
1.5 tsp. salt
1.5 tsp. baking soda
3 cups of chocolate chips

Mix butter, brown sugar and sugar. Add flour, salt, and baking soda. mix. Add chocolate chips and mix. Bake 8-10 min. @350 degrees. Makes 5-6 dozen.

I topped the cookies with frosting and a chocolate chip (you can never have too much chocolate) and put one on top of each marshmallow topped cherry chocolate chip cupcake.

YUM!!

Tuesday, June 7, 2011

Hanging Tissue Ball Tutorial

Supplies Needed:
tissue paper
scissors
floral wire

Step 1: unfold your tissue paper all the way


Step 2: I cut mine in half so the finished product wouldn't be so huge.

Step 3: Fold them into an accordion fan shape like the ones you made when you were a kid. Then wrap wire around the middle.

Step 4: cut off the ends in either a circle shape or so that they come to a point. I did circle.


Step 5: fan out both sides as much as you can

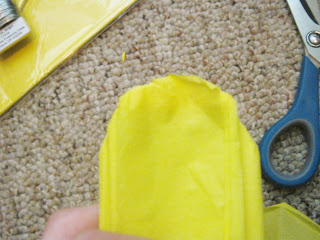
Step 6: carefully (this is important because the tissue paper tears easily) pull up on each layer until it forms a pretty ruffly hanging tissue paper ball. You might have to play with the layers a little bit when you are done to get it to fill in all the right spots.


Finished Product:

You can loop string, ribbon, wire, etc. through the wire on top to hang them from the ceiling.